Friday, August 31, 2012

High Five For Friday!

High School Edition...

{one}
high five for completing my first week of sophomore year!!

{two}
high five for finding out coffee will help your serge through the toughest of high school homework!

{two}
high five for coming into contact with my inner artist in my high school folk art class
*rough draft of my portfolio design! traditional initials with my passions merged in!

{three}
high five for reaching 100 followers my first week of sophomore year!

{four}
high five for looking cute every day the first week of sophomore year!

{five}
high five for being the bigger person in several sticky situations this week in high school!


Thursday, August 30, 2012

Homemade Buttermilk Biscuits

Homemade Buttermilk Biscuit Tutorial!
A favorite in the South
Prep: 20 min., Chill: 10 min., Bake: 13 - 15 min.


These biscuits are simply heavenly. With no "rising" required, it took me a mere 30 minutes to  mix and bake these biscuits (longer than the recipe calls for because bread isn't my specialty). They are so easy to make and so worth it! This recipe came from Southern Living magazine and has never failed me! 

1/2 - cup cold butter (1 stick real butter)
2 1/4 - cups self-rising flour (not all purpose)
1 1/4 - cups buttermilk or make your own (see note at end of recipe)--additional flour for counter surface to knead dough
2 - tablespoons of butter, for melting


 Cut butter with a sharp knife or pastry blender into 1/4-inch-thick slices. Sprinkle butter slices over flour in a large bowl. Toss butter with flour. Cut butter into flour with a pastry blender until crumbly and mixture resembles small peas. (I used my hands) Cover and chill 10 minutes.

Add buttermilk, stirring just until dry ingredients are moistened. Turn dough out onto a lightly floured surface; knead 3 or 4 times, gradually adding additional flour as needed. With floured hands, press or pat dough into a 3/4-inch-thick rectangle (about 9 x 5 inches).
Sprinkle top of dough with additional flour. Fold dough over onto itself in 3 sections, starting with 1 short end. (Fold dough rectangle as if folding a letter-size piece of paper.) Repeat entire process 2 more times, beginning with pressing into a 3/4-inch-thick dough rectangle (about 9 x 5 inches).

Press or pat dough to 1/2-inch thickness on a lightly floured surface; cut with a 2-inch round cutter, and place, side by side, on a parchment paper-lined or lightly greased jelly-roll pan. (Dough rounds should touch.)

Bake at 450° for 13 to 15 minutes or until lightly browned. Remove from oven; brush with 2 Tbsp. melted butter.

* If you do not have buttermilk, you can always make your own by using vinegar or lemon juice. 1 tablespoon vinegar or lemon juice plus enough milk to make 1 cup. Let mixture stand for 5 minutes before using.


***

ingredients^
sliced stick of butter, ready to add to flour^
used my hands to cut butter into flour^
chilled with buttermilk added^
dumped mixture onto lightly flowered wax paper^


kneading, pressing, and folding process^^^

using a glass to make cut out the biscuits^
slightly touching biscuits on a lightly greased pan^

put biscuits in oven at 450 degrees F. baked for 10 minutes, checked, and baked for additional 2 minutes. ^

meanwhile...
slice up 2 tablespoons of butter, put in microwave safe bowl (measuring cup for me) and heat on high for 20 seconds. heat for additional time if not thoroughly melted. 

while biscuits are still hot, brush with melted butter...♥


Today they were served with grape and strawberry jellies, but are amazing with any meats, gravies, or just plain!!!


Wednesday, August 29, 2012

WIWW: First 3 Days

If you haven't seen it on my Twitter or Instagram... this Monday was my first day of 10th grade! Woohoo! I loved how my first two days outfits looked on me so I wanted to share them with you all by linking up with Lindsey in her weekly motivational link up, What I Wore Wednesday. You'll also see two photos of the outfit I'll be wearing tomorrow! Enjoy!


Monday:


blouse: Marshall's
jeans: American Eagle
sandals: Marshall's
necklace: here
purse: Coach

Tuesday:


blouse: Marshall's (beige cami from old navy underneath)
pants: Old Navy
belt: Kohl's
sandals: Rack Room Shoes
necklace: Christmas present 
watch: boutique at the beach
purse: Coach

secret for keeping bottom of shirt tied all day long: hold the ends together and wrap a clear elastic around it like your making the ends into a pony tail...then tie the ends into a knot!

Wednesday (today!):


when I get home from school today, i will update this post to include photos of the outfit on me!

blouse: Old Navy
cardigan: Marshall's
jeans: LA Idol
belt: Kohl's
sandals: Rainbows

Happy Wednesday!


Tuesday, August 28, 2012

Clothes Slip No More

I've had a break through. Well some lady on Pinterest had a break through and I embraced her genius-ness.

Don't you hate when your clothes slip off those plastic hangers? Yeah, me too. But who would've thought hot glue could fix your problems??


What you need:
-the stubborn, slippery hangers
-a hot glue gun


Your objective: to make a zig zag pattern with the hot glue down the hanger


BAM!


Why this works?
The hot glue zig-zags create texture... the bumps prevent the clothes from falling off. And for those strappy tanks- the straps have to slide over each little grove to fall off...yeah, right!

PROOF!

Shirt: American Eagle Outfitters
Shirt: Marshalls
Shirt: Marshalls
Shirt: American Eagle Outfitters

I held these hangers at strong angles and took photos to show you that doing this little DIY will make a dramatic difference in how much better your clothes stay on the hangers. You can also do this on wire hangers, but these plastic ones are typically the pesky ones for me! Changed my life!


Collaging

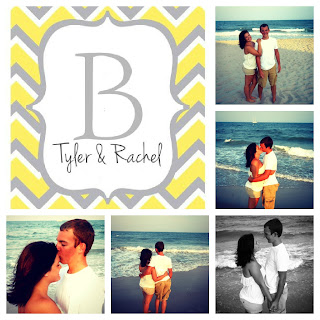
Notice all the snazzy collages I have included in my posts lately? They're all thanks to PicMonkey! This site is amazing. Way better than Picnik, Photo Bucket, all that stuff! Check it out. It isn't just for making collages... TONS of free editing features available!!
This is my new, and amazing laptop background- thanks to picmonkey.com. Makes me smile every time I see it!!

No, we aren't married. But my last name is Bell, his is Brown.. so it works!

If you like the yellow and grey thingy in the top left, I have the photo without our words in it. I'll be happy to send it to you so you can enjoy it like me!


Sunday, August 26, 2012

Virtual Tailgate: Pillow Dogs

I am linking up with Kaitlyn! She blogs over at Wifessionals! She is the host of the new link up Virtual Tailgate! She is your typical football lovin' southern girl! This link up is where you do a tutorial on your favorite tailgating recipe, and link it up to share it with all the other fabulous ladies like yourself! I RSVP'd for this link up so that sort of makes me a "co-host" but anyone can link up to join the fun!! Enjoy my recipe! 

Pillow Dogs♥


Pillow Dogs
makes: 40-45 pillow dogs, prep time: 10 minutes
cooking time: 20 minutes

1 package (14 oz) miniature beef cocktail wieners (the container this go round had 42 mini wieners)
1 container (16.3 ounce) prepared buttermilk biscuit dough. Pillsbury Grands
1 cup shredded sharp cheddar cheese, Kraft
   Mustard, optional

1. Preheat oven to 375 degrees F. Line sheet pan with parchment paper or foil. In a grill pan on medium heat (I just used a large frying pan) cook cocktail wieners in two batches until plump, about 5 minutes. Set aside.
2. On a clean surface, cut the 8 large biscuits into sixths. Place cheese in a small bowl and roll each slide of dough in the cheese to make little cheese balls. Gently stretch each ball to fit a mini cocktail wiener. Partially wrap the dough around the mini cocktail wiener.
3. Arrange pillow dogs on prepared sheet pan. Leave about 1-inch space between each roll. Bake for 10 minutes. Top with mustard or other desired condiments. Serve warm.

ingredients

lined baking sheet

cooking wieners + plump wieners

flatten then cut biscuits

pat around in cheese, flatten out, wrap around wiener

bake for 10 minutes


I give you.. Pillow Dogs. The name comes from the they look like mini- hot dogs lying on a pillow. Cute, right? 

Once I had a platter, arranged the pillow dogs in the shape of a football, then drew the stitching of the football with mustard. They're are tons of possibilities for a cute presentation with these little guys! Be creative and enjoy!